Raspberry Pi Operational System Installation Walktrought
Prerequisites
- Computer
- Raspberry Pi device
-
4GB SDCard Note: The operational system that we will use occupies around 3GB of space.
-
Raspbian Operational system Note: When downloading, keep the SHA-1 Checksum code (E.g.: 99e6b5e6b8cfbf66e34437a74022fcf9744ccb1d) This will be used latter to assure that the download file is not corrupted.
- Win32 Disk Imager
- MD5 & SHA Checksum Utility
Procedure
- Using the MD5 & SHA Checksum Utility verify if the downloaded Raspbian Operational system is not corrupted.
- Extract the Raspbian Operational system » Your image file will be available (*.img).
- Extract the Win32 Disk Imager
- Connect the SDCard on your computer
- Execute the Win32 Disk Imager elevated (With administrator rights)
- Select the SDCard Unit:
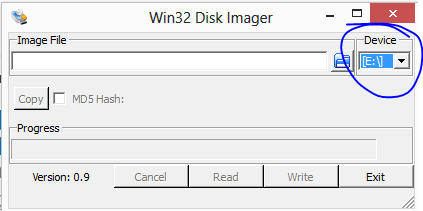
IMPORTANT: Be careful to select the right unit where your SDCard is installed. The unit selected will be formated and therefore if you select the wrong unit you might damage your computer.
- Select the Raspbian Operational system image file and press the write button » Your image will properly written on the SDCard.
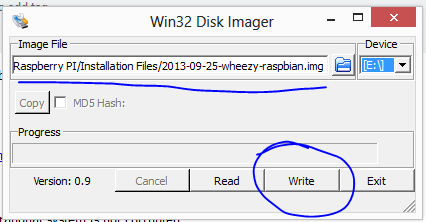
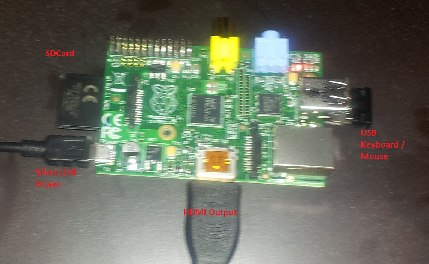
- Once the SDCard is write, eject the SDCard, connect it on the Raspberry Pi, plug it in your TV or Monitor using the HD output and power it:
-
Be sure to have your TV properly configured on the proper HDMI input before powering the Raspberry PI, otherwise it might not recognize the HDMI output.
-
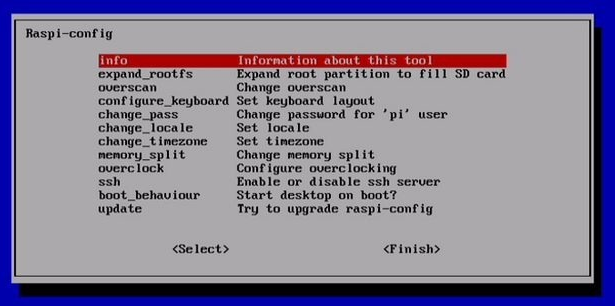
On the first Boot you will have a configuration screen. On this screen you can configure the image to use all your SDCard space for the operational system. When you finish with this first configuration, the device will be rebooted.
-
When you boot the device for the second time, it will require an user and password. The default user is “pi” and the default password is “raspberry”
-
To start the graphical interface you type “startx”
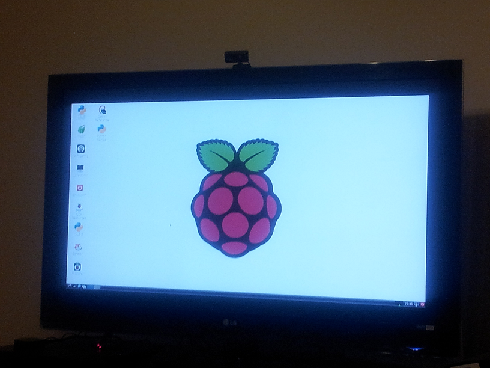
You are done!
Note: You can access the first boot configuration window on your graphical interface, by opening the “LXTerminal” and typing the
sudo raspi-config
